Monday, May 31, 2010

All Pink !

Hello scrappers, it's Aida back again.

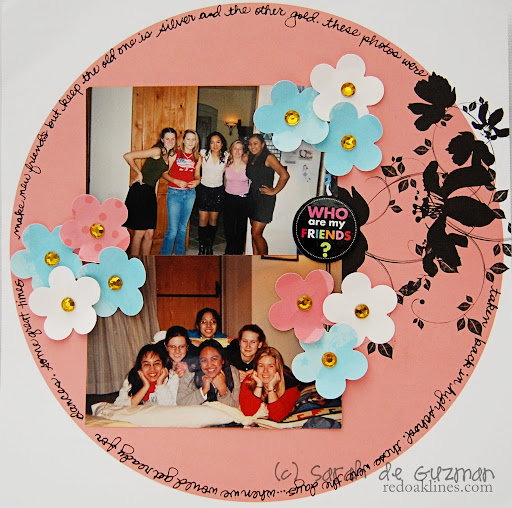
Very often scrappers find it easier to create a layout by limiting the color palette but, how do you avoid a layout from looking bland ? While the story behind the layout is important, we still want the page to look attractive and eye catching. The layout below of my scrap-pal Kristy and her daughter Kira is almost monochromatic Pink with touches of Kraft and White and I'd like to share some design elements which might be useful.


What I learned :

1) Use striped pattern paper as it creates visual length horitzontally or vertically. In the layout above, the stripes frame the center details as well as give height to the layout

2) Frame the photograph in a shaped paper. This helps to draw the eye to the subject of the layout.


2) Add one large accent and build on it. The cut-out Butterfly is a very simple embellishment from pattern paper and it was layered with details. There is a cicular tag that has been altered as well as blings and buttons, the journaling was placed across the butterfly. I had used the swirls and the sides of the paper in a previous layout, but the center was perfect for the butterfly !


3) Use smaller fonts for your title. A smaller sized title does not take attention away from the photos, takes up less space and it's easier to fit into the layout for balance.

Try putting the ideas into use for your next layout ! I'll see you soon.

** Aida **

Sunday, May 30, 2010

1985 & Home - layouts by Polinka

Hi there!

It's Pauline again, with 2 new pages...

Home - Maison

Background paper: Chic by Urban Lily - Just Add Color Collection


I worked around the background paper, with its olive green that was fitting perfectly with the picture's color... I added a white paper around the photo, and more rectangles around, by stitching or simply some stickers...


Aux Baléares, 1985


Memory Photocards - Luna by Urban Lily
Urban Lily Mooch Collection Gossip

I stitched along all the white designs, to make them pop out a little more... and I also added some touches of paint...


Hope you're enjoying your visit on the blog,

have a great day,

*Polinka

Saturday, May 29, 2010

Spirit of Simplicity

I've noticed a trend lately in using white backgrounds with clusters of flowers and bright colors. The Urban Lily Bliss paper shown below fits perfectly with this trend and using it makes a very quick and beautiful page.


The background of this Simple page is Bliss from the Mayella Collection. I cut the white center out of the frame in the page and placed my photo underneath. The photo is backed with Gossip from the Mooch Collection. I used a script font for the title and added flowers under the frame from an assortment of companies that just happened to match the beautiful blues in the papers.

The second page I want to share with you is of my adorable son and his cousinFor this page I've used another trend, borders. The bright colored circles from Hyperactive in the Mooch line make up the border on the right side and help to show just how much fun the kids were having. The blue background paper is the Happy paper from the Happy Everything line. I've also added a second border on the right side using Impish from the Urban Lily May Ella line. To continue the circles theme, I used part of one of the circles from Forever in the Happy Everything line. This page is so bright and cheery, just like the little sweeties in the picture.

I hope you will find something bright, fun, and simple to play with from Urban Lily today!
Rachel

Friday, May 28, 2010

card making

Hello everyone! I am Akiko. I introduce two cards today.

Supplies:
Sugarhigh - Mooch Collection
Hyperactive - Mooch Collection
Raw - Mooch Collection
Celebrations Rub-ons
other - cardstock,pen

I stitched handwriting on this card.
oops! I failed in transfer of Rubon:(
I will add with a black pen later.

Supplies:

Hyperactive - Mooch Collection
Memory Photocards - Polka Dot
Alphabet - Urban Cut Collection
Mini Book B&W - Urban Cut Collection
Celebrations Rub-ons
other - cardstock,pen
Adhesive-Helmar Adhesive

I added the handwritten line also to this card.
I like writing by hand.
It is because it becomes a card of warm touch by adding handwriting.
I think that it is putting the heart, making a card and presenting the card and that it is wonderful.

Thank you.
Akiko:)

Thursday, May 27, 2010

Some Urban Lily Goodies to Share!

***Warning: This post is photo heavy!***

Hi! It's Virginia again and I would like to share some Urban Lily goodies that I have finally had a chance to experiment with!

First up is the Secret Keeper Cardstock. For whatever reason, I was intimated by ths product. *blush* Well, I had a stack of pictures from my daughter's surprise birthday party and this was the perfect product for preserving those memores.

Here is the front with the "gated" doors.


I used the Sushi Stripe and Sushi Dot papers to cover the front.  The alphas are Heidi Swapp and are available here. (I just noticed that these are the wrong colour but I know Becky will set you up with the right ones!)

Inside are pictures of the party attendees and highlights of the party. I have left it blank inside as my daughter wants to journal about the party herself. As well, I can only show you pictures of my daughter as I do not have photo rights from the other parents.


And I could not resist making up this board book for a sweet Father's Day gift.


My daughters are each writing a few words in the "secret" journal areas of the mini album for their dad. I love that the album is hot pink...he is the Dad of 2 girlie girls after all! Here are a couple of the pages.


And lastly, I was in such a groove that I whipped up a layout as well using the Breeze and Linen Stripe papers.


Thank you for letting me share.
-Virginia
http://www.virginiawongmichiels.blogspot.com/

Tuesday, May 25, 2010

Wedding layouts by Polinka


Hi Everyone!

Let me show you these 2 layouts about my parents' wedding in 1974...
Accordingly to the pictures' colours, I choose Green and pink papers and cards from Urban Lily:

Background paper: Apple by Urban Lily - Sugary Collection
Stripes: Sushi Stripe by Urban Lily - Everyday Lily Collection
Pink card: Memory Photocards - Posh by Urban Lily **Holiday Hangover Kit

I wanted to keep a simple and symetrical design on both layouts... I just added a little bit of pink paint on the background, and stitched the papers together with pink thread...

Hope you'll like them,

Polinka*

Monday, May 24, 2010

A Dressing Tradition

Hello, hello, hello! In Canada, this is a long weekend as we celebrate Victoria Day. Right now, I am sitting in Fernie, British Columbia, sipping an ice cold iced tea and scrapbooking. Can life be any better????

Let me get on with the post...if you are like me, you have photos lying around, some with a common theme and others completely distinct. The photos on the layout below have been sitting in my photo box for years! But when I saw the Cheeky (Mayella collection) paper, I squealed because I could finally use these pictures.

Here is my layout...


To the Cheeky paper, I added Sushi Stripe, Sushi Dots and Sushi. The mini alphas and glitter chipboard pieces are from Making Memories and the large alpha is from Heidi Swapp.

Thanks for letting me share! (Sssh....I wanted to leave you with a secret...I have several more projects to post later this week. I hope you will come back to visit this blog. :-) )

-Virginia
http://www.virginiawongmichiels.blogspot.com/

Saturday, May 22, 2010

Beautiful sweet Emma

Hello everybody!
Today I show you an adorable little girl, (my friend Elena's daughter, Emma) and a gorgeous and colorful Urban Lily paper... a perfect match isn't it?


Urban Lily supplies:

Beautiful paper - Happy Everything collection

Alphabet - Urban Cut collection

Others: DCWV cardstock.


I glued the purple half pearls using Gemstone glue by Helmar (can't scrap without it!)


I sprayed Cherub Pink and Oriental Poppy Glimmer Mists... love them!
Happy scrappin!!!!

Friday, May 21, 2010

I love 12-inch layout!

Hello! Akiko of today's blog is a host.
I like making a 12-inch layout.
The 12-inch layout using one photograph of 4x6 inch size is introduced today.

Supplies:
Gossip - Mooch Collection
Ink - Blink Collection
Memory Photocards
Answer It Chipboard
other-cardstok,craftpunch,lettering,pen,brads,flowers


Supplies:
Lala - Lulliloo Collection
Lulu - Lulliloo Collection
Mini Book B&W by Urban Lily
Love Seals Rub-ons
Answer It Chipboard
Adhesive-Helmar Adhesive
other-cardstok,craftpunch,lettering,Hemp string
 
These are the layouts which can be easily made also from whom.


And these could be made in one-sheet about 1 hour.

Thanks for visiting a Urban Swank blog!
See you next time:)

Akiko

Thursday, May 20, 2010

Gift in a Can

My best friend's birthday was coming up and I already had a present made for her. I knitted her a turtle, my first ever knitted animal. I'm so excited about it and I wanted it to be presented perfectly. I don't know about you, but I save just about every single can, box, and bag that comes into the house. I'm almost like a little old lady who saves everything that might be useful and when I die, you'll find cabinets shoved full of twist ties from the bread sacks. Ok, it's not that bad...yet! Anyway, I thought it would be wonderful to alter one of the cans I had around for her present. I found an empty cappuccino can that fit the turtle precisely. I trimmed a piece of Urban Lily Mooch Collection Gossip to the size of the can. Then, I applied Helmar Craft and Hobby PVA Glue to the outside of the can using the most perfect tool to spread it around, my finger. I felt like a kid again, it was so much fun playing in the glue. :)

I decided to put a heart from the Urban Cut Accents papers over the gap between the where the ends of the 12 inch long strip of Gossip paper didn't quite make it around. I think it hides the seam really well.

Because it is for a birthday present, I cut the word celebrate out of the Urban Lily Happy Everything Celebrate paper along with some of the gorgeous butterflies on the paper to decorate the sides of the can.


For the lid, I cut circles of paper to fit the lid and then added ribbon around the outside. Because the lid is plastic, I used the super fabulous Helmar 450 Quick Dry Adhesive. It worked like a dream! And, the paper is still flexible so the lid goes on and off easily.I also folded the edge of the ribbon over the top of the can and the Helmar 450 held it securely in place.
My BFF loved her present and the container that it came in!

That's it for today. But, I'll be back soon with more fun Urban Lily projects!
Rachel

Tuesday, May 18, 2010

Kissed by the sun

Good morning ladies!
Stitching is a great way to highlight paper details on your pages, I love it!
On this LO, I handstitched some swirls on the gorgeous Smootch paper by Urban Lily:


Urban Lily supplies:

Smooch paper - Mooch collection

Lulu paper - Lulliloo collection

Alphabet - Urban Cut collection

Memory photocards - Swirl

Others: Bazzill cardstock


I splashed China ink using a brush...


... and I used embroidery floss to stitch the swirl.
Do you like to stitch on your LOs? Show us your handstitched Urban Lily projects, we'll be happy to see them :-).
'Till next time,

Sunday, May 16, 2010

Customize a Background !

Hi there, it's Aida back again with another layout !

As more scrappers add mediums to their regular scrappy supplies, we are seeing wonderful customized elements to layouts and projects. The easy to do background below is an idea from a scrapper friend and not entirely mine, but it's so much fun to do, sharing it here would be a great starting point for Urban Lily fans. Here's my layout :


For the background you will need a white cardstock, a Glimmer Mist of your choice and a Ranger Dabber paint. To match the UL papers used I chose the Mist in Candy Apple Red and the Dabber in Picket Fence. I misted the center of the cardstock and then added two strips of UL's Sugary Midsummer


Shake the Dabber to make sure the paint soaks through the sponge, then dip the sponge tip in a little water.


Hold the dabber 10 inches above the misted cardstock and let the paint drip, squeezing the bottle to force more paint out. Let the paint splatter naturally or you can dab the sponge tip directly on the cardstock.


Make sure the background dries completely before finishing the rest of your layout ! Easy right ?

Urban Lily products used :


Thanks for dropping by !

Back in the Day!

High school seems so long ago, but the memories that are made during this time period are with you forever. To ensure and document those memories, what better way to remember those moments!? Scrapbooking, of course! ...and I did just that.

Here's a little peek into those high school days using none other than Urban Swank paper:


Here's a close up of the flowers on the above layout:


To create those flowers, I used a some of my scraps from the following papers:


Great colors, don't you think?! :)

Anyway, hope you enjoyed looking at some of my high school memories. These papers definitely added a great touch to my photos!

Hugs,
sarah.

Saturday, May 15, 2010

I [heart] you more than everything

Hi ladies!
it's Simona again with a new LO.

I love the soft and delicate colors of the Ink paper - Blink collection by Urban Lily :


I just added a white and a light blue cardstock, some crystals, flowers and Thickers, et voilĂ :


I glued the crystals to the cardstock using Gemstones Glue by Helmar... it's fab!


Are you ready to cut out this beautiful patterned paper? Scissors ready? Go! Have fun ;-)!